The Auxiliary Back-Office program allows to access the Back-Office program
from another PC on the network.
For example: You may want the accountant to be able to generate Back-Office
report from his own terminal.
Use this installation program to add a shortcut on the desktop towards
the system that the Back-Office application can be reached on.
IMPORTANT: Please note that you cannot stop or start the Maitre'D Server,
close EFT batches, create workstation data or boot disk, nor start End
of Day procedures from an Auxiliary access.
Minimum requirement:
Auxiliary Back-Office terminal
Intel Pentium processor operating at 200 MHz
64 MB RAM
One (1) 500 MB hard disk formatted and partitioned to appear as drive
C
One (1) Ethernet network card supporting at least 10 base-T
1 MB video card
Windows 95 / 98 operation system
Step by step to install Auxiliary Back-Office access
Login to Maitre'D network
Install Auxiliary Back-Office Access program
Login to Maitre'D network
The usual network components and settings must be installed before you
can use this computer as an Auxiliary Back-Office access.
Install Auxiliary Back-Office Access program
From the Windows Desktop, double click on Network Neighborhood icon and
browse the network to access the "autorun.exe" program on Maitre'D
installation CD-ROM.
(To access the installation program, the CD-ROM of the main server must
be shared)
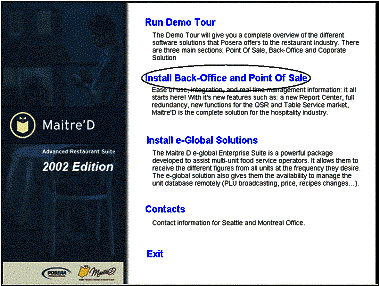
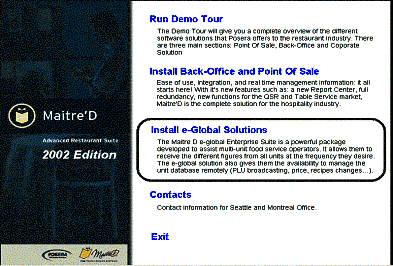
When the Maitre'D Installation screen displays, select "Install Back-Office
and Point Of Sale" as shown below.
Installation screen
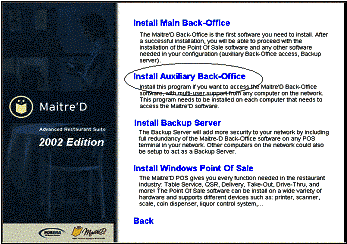
Then, to install the Auxiliary Back-Office Access program, select "Install
Auxiliary Back-Office Access " as shown below.
Install Auxiliary Back-Office option.
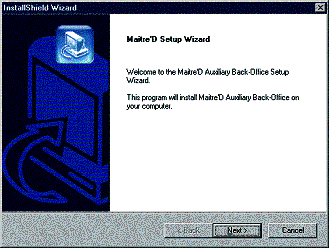
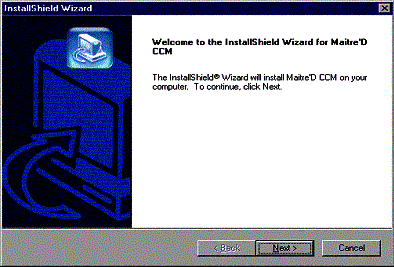
Click "Next" on the Auxiliary Back-Office welcome screen to start
the installation.
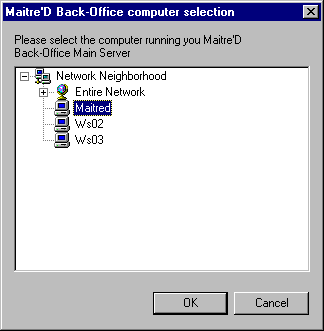
Then you need to select the computer running your Maitre'D Back-Office
Main Server. Select from the list of your Main Back-Office computer on
the network.
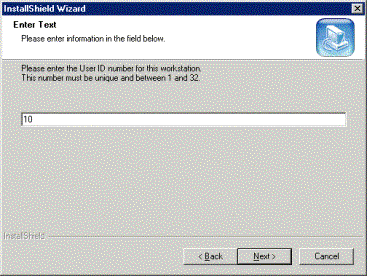
In case you are installing the Auxiliary Back-Office access on more then
one PC on your network, the following screen displays, asking for a user
ID that is used to access the Back-Office. Enter a different number from
1 to 31 for each Auxiliary access you are installing on your network (as
shown below).
When the installation is complete, you will have to shut down and restart
the terminal.
Once the system has rebooted, you will need to license the program. Follow
these 5 steps.
Enter the serial number printed on the CD-ROM case
or on your invoice provided by Posera, and the commerce name, exactly
as it was entered on the Maitre'D Back-Office Main Server. Click next
to continue.
The system will prompt to the request key code screen,
read the message and print the form. Send that form through email to support@posera.com or through fax
to Posera at (514) 499-9951, to the attention of support. Click next.
Enter the key code number provide by Posera. Click
next to continue.
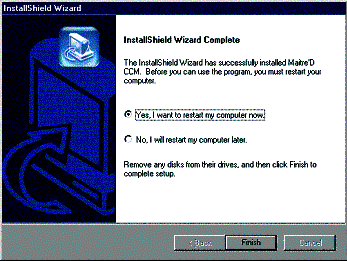
A congratulations message will show.
Click Yes to finish the installation process and to restart your computer.
Once in your Windows shell, the Software asks you
to update the database, click "Proceed". Maitre'D will automatically
convert the database. Once the update is completed, there will be a Maitre'D
Auxiliary Back-Office icon in your task bar.
Once this system has rebooted, you will notice a new icon (below) added
to the desktop as an Auxiliary Back-Office access. Use this shortcut to
reach the Back-Office program.
Install Multi-Unit application
Boot the system on which the Maitre'D Corporate Communication application
needs to be installed. Once the system has started, insert your Maitre'D
CD-ROM. From the autorun, the following screen displays:
Select Install e-Global Solution. The Maitre'D Corporate communication
installation screen appears.
Read the instructions and click on Next. The program displays the
license agreements; click on Yes if you accept to start the installation.
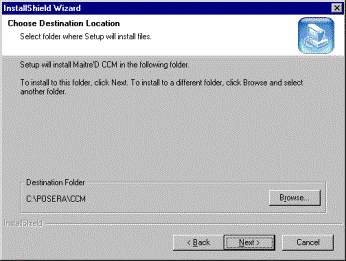
The installation program checks the hard disks installed in the computer
and shows you the destination folder where will be installed the program(s).
You may change this default folder by using the browse button. Then click
Next to go the next step.
The installation program displays the different Maitre'D Corporate Communication
setup that can be installed on this PC. Select from the list the Custom
setup.
Select only Multi-Unit from the custom selection list. Then click Next
to start loading the applications.
When the installation is completed, the installation program will display
a screen showing that installation was completed successfully.
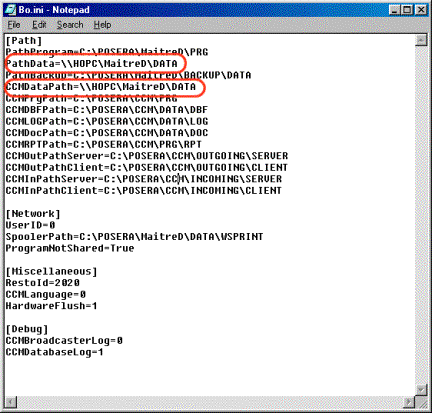
Modify the Bo.ini file to point on the Corporate Office PC
On this Auxiliary access system, edit the C:\Posera\MaitreD\Data\Bo.ini
file
Within this file, modify the PathData and CCMDataPath lines to point to
the data folder on the Maitre'D Back-Office Main Server.