(Maitre'D Millennium, and later versions of Maitre'D)
Emergency Backup for Windows POS provides security. The Emergency Backup
will add more security to your network by including full redundancy of
the Maitre'D Back-Office software on any POS terminal in your network.
Another computer on the network could also be setup to act as a Emergency
Backup.
Example: For any reason the Main Back-Office Server goes down and is
no longer available to manage your network, with a few keystrokes your
designated Emergency Backup will take over and in a matter of seconds
will become a fully operational Back-Office for the rest of your workstations.
This document gives instructions to install a Emergency Backup on one of
the workstation. Skip the workstation installation section if you want
to install the Emergency Backup on another computer on the network.
Minimum System Requirements:
Intel
Pentium processor operating at 200 MHz
64 MB
RAM
500 MB
hard disk properly partitioned and formatted to appear as drive C
Ethernet
network card supporting at least 10 base-T
1 MB
video card
Touch
screen
Windows 95 / 98 operation system
Note: These specifications are for Maitre'D Millennium only.
If you are using a later version, refer to the M.S.R. of the Main Back-Office
Server for that version.
Step by step to install the Emergency Backup
Login to Maitre'D network
Install Windows workstation program
Install Maitre'D Backup server program
Redo workstation data
Login to Maitre'D network
The usual network components and setting must be installed before you can
use this computer as a Backup server. To assist you about connecting this
terminal to the network, refer to the Installation guide.
Install the Windows workstation program
If you want to have one of your workstations to act as an Emergency Backup,
you must install the workstation program first. To install the Windows
workstation program, please refer to the Windows workstation installation
instructions. When the workstations application is up and running, use
a manager employee to close the POS from FUNCTION button / MANAGER MENU,
SPECIAL FUNCTION / CLOSE POS option.
Install Maitre'D Emergency Backup program
From the Windows Desktop, double click on the Network Neighborhood icon
and browse the network to access the autorun.exe program on Maitre'D CD-Rom.
(To access the installation program, the CD-ROM drive must be shared on
the main server).
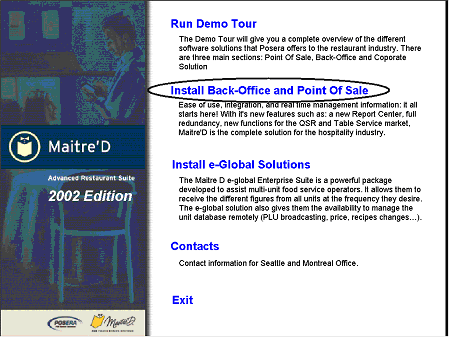
When the Maitre'D Installation screen displays, select "Install Back-Office
and Point Of Sale" .
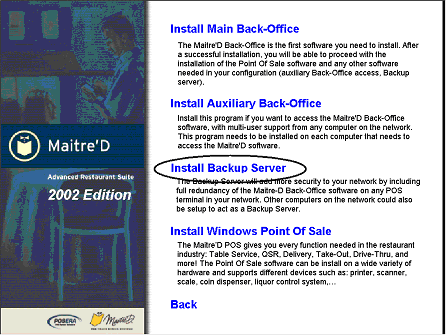
To install the Emergency Backup program, select "Install Backup
Server".
Note: If you are not installing from a CD, but from a downloaded version,
Run the installation from a DOS Command Prompt. Navigate to the disk1
directory, and type the following command;
Setup.Exe Backup
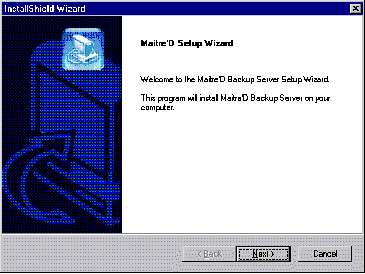
Click "Next" on the Emergency Backup welcome screen to start
the Backup server installation.
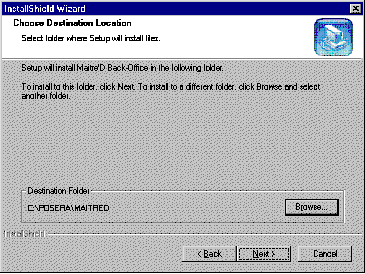
The setup program installs the Maitre'D Back-Office directories in the
following default directory C:\POSERA\MAITRED. This default value is used
for the Program root, Data root and Backup root. To accept this path,
click on "Next" and the installation program will create the
following directories: C:\POSERA\MAITRED\PRG C:\POSERA\MAITRED\DATA and
C:\POSERA\MAITRED\BACKUP.
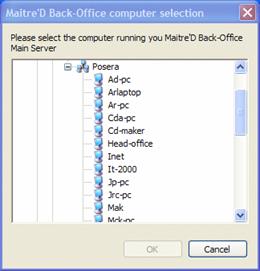
Then you need to specify the computer running your Maitre'D Back-Office
Main Server. Select from the list your Main Back-Office computer on the
network.
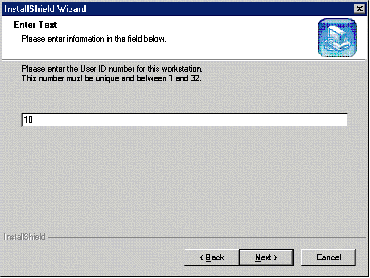
Note: If you are installing the Emergency Backup on another PC on your
network, the following screen display asking you about a user ID that
is used to access the Back-Office. Enter a different number from 1 to
31 for each Emergency Backup you are installing on your network.
When the installation is complete, you will be prompted to shut down and
restart the terminal.
Once the system has rebooted, you will need to license the program.
Follow these steps:
Enter the serial number and the commerce name printed on the CD-ROM
case or on your invoice provided by Posera. Click next to continue.
The system will prompt to the request key code screen , read the
message and print the form that you will email to support@posera.com or fax to Posera at (514)499-9951
attention of support. Click next.
Enter the key code number provides by Posera , click next to continue.
A congratulation message will show, then click yes to finish the
installation process and to restart your computer.
Once and your on your Windows shell, the Software asks to update
the database, click on "Proceed". Maitre'D will convert the
database automatically. Once the update is completed, you will notice
a Maitre'D Server icon installed in your task bar.
Also from the installation, a new icon is added to the desktop as an Auxiliary
Back-Office access. You can use this shortcut to reach the Back-Office
program.
Note: If you are installing the Emergency Backup on another PC on your
network, you must create this shortcut, defined as follows;
Program: C:\Posera\MaitreD\Prg\Starter.exe
Startup Directory: C:\Posera\MaitreD\Data
Recreate Workstation data
From the Main Back-Office Server, redo all the Windows workstation data.
This will automatically restart the workstations program with the Backup
server parameters inserted in their booting sequence.
Note: If using a DOS Workstation, to add the Backup server parameters
to the booting sequence, you must create a new boot disk for all DOS POS
on your network. This is no longer supported by Maitre'D 2005.
Start Emergency procedures
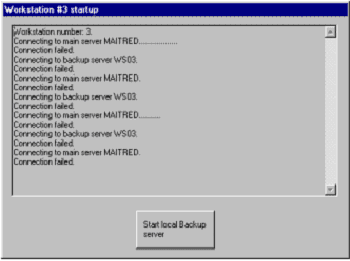
When the Main Back-Office is no longer available to your network, workstations
try to connect to the current Back-Office server and after few seconds
will try to restart the workstations program. From that start workstation
program, the Backup server will propose to start the Backup server procedure.
Select "START LOCAL BACK SERVER" to start the Backup server
procedure.
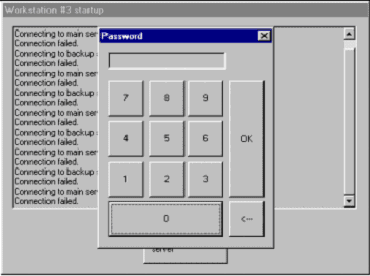
Before Maitre'D starts the Backup server operation, you are prompt to enter
a different password.
This password works with current date on the computer. You need to add
the date digits together and enter the results as the password. This procedure
is to prevent employee's to start emergency server procedure involuntarily.
Examples of password to provide.
Let's presume that the current date on this PC is: September 25, 2001
Year
20
01
Month, day
09
25
Total
29
26
password
2926
Let's presume that the current date on this PC is: November 15, 2001
Year
20
01
Month, day
11
15
Total
31
16
password
3116
Enter this password to start the Backup server procedure.
What Backup server procedure do
Updates the local program directory with current data information.
Reconstructs the current day using the electronic transaction journal (MEMOIRE.DAT).
Redoes automatically all workstation data
All workstations on the network try to reach a main Back-Office server
or Backup Back-Office server. In this setup, they first try to reach the
computer named MAITRED to access the program, if it is not available,
the workstations will try to reach a computer named WS03 to access the
program. When the Backup server finishes the emergency procedure, it will
then be available to all workstations as the current Main server.
Restore Main Back-Office server
Even if the program supports it, for operational reasons, it is not recommended
to restore the Main Back-Office server in the middle of the day. When
you are ready to bring back the Main Back-Office server, the following
procedure must be followed:
Step by Step to restore Main server
Login
New Main server to Maitre'D network
Start
the Main server restoration procedure
Control
file update
Restart
all workstations
Login the New Main server to Maitre'D network
The usual network components and settings must be installed before you
can use the computer as the main server. To assist you about connecting
this computer to the network, please refer to the appropriate section
on this document. Same Maitre'D software and service pack must be installed
on the New Main server. A little test to make sure that the computer is
back on the network; double click on the Network Neighborhood icon.
Start the Main server restoration procedure
The Main Server restoration should be done by a Maitre'D certified technician.
Close all workstations on the network except the Backup server. From the
Backup Server, under Server Control / File menu, select RESTORE MAIN SERVER
option.
The Backup server will transfer all the needed information to bring the
New Main server as the current Main Maitre'D server on the network. Then
it will change its status to Backup server again.
From the New Main Back-Office server, files will be updated with current
data information and all workstations data is regenerated automatically.
At the end of the restoration procedure, a message will prompt you saying
that the Control File was updated. Click "OK" to finish the
restoration.
Start all workstations, shut down and restart the Backup server.