Installing modem DataTran 162 ND on Maitre'D for Windows
1st step:
Installing the modem under Windows 95-98
Plug your modem into your COM port. Put the power ON and from the Control
Panel, select Add New Hardware and let Windows detect new hardware. After
this procedure, Windows should have detected your modem on the COM port
that you have used as CPI VIVA MODEM 24.
2nd step:
Checking if the modem is responding.
From Maitre'D Back-Office, go into Server Control / File and select Stop
Server. Close all Maitre'D Windows.
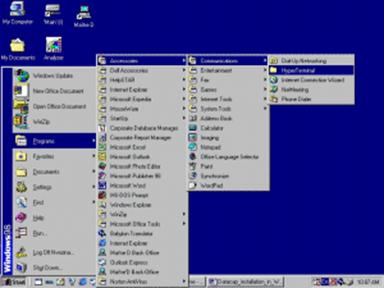
Click on your Start button from your desktop. You will then need to select
Hyper Terminal. Depending on the way your system is configured, you might
access it through different menus. Basically you will find it under Start
/ Programs / Accessories / Communications / Hyper Terminal.
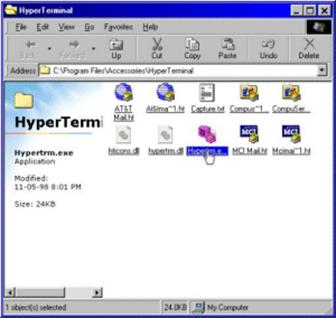
Windows will display a folder such as:
Select the application Hyperterm.exe and you will be guided you through
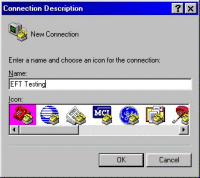
a new connection. You will see a window like this:
Enter a name for that new connection: EFT testing, and select an icon.
Then click on OK.
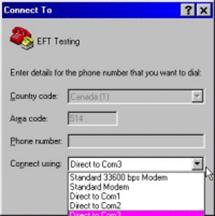
System will then display this window. Select the COM where your modem is
plugged using the drop-down in the Connect Using field, and click OK.
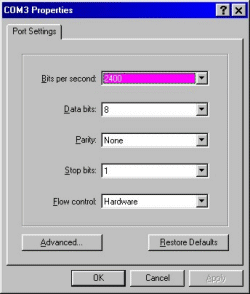
At this point, a configuration window will display. Enter the following
information:
Bits per second: 2400
Data bits: 8
Parity: None
Stop bits: 1
Flow control: Hardware
Once completed, this window should be like this:
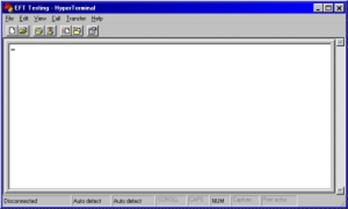
Click on OK to accept those settings. You will then access your dialog
window:
Type AT and press ENTER. Answer will be 0, OK or ERROR. If there is no
answer, check modem for connection, power; If answer is ERROR, type the
command ATandUF1 0 and press ENTER to bring it out of financial mode.
Note that there is a space between 1 and 0 at the end of the command.
Then retry the AT command.
3rd step:
Checking if the software is already downloaded in the modem.
When the modem was found, we need to test the software in the modem. Use
the ATandUP96 command to list the networks. A list of networks should
be displayed with some setup at ON.
If the command gives an error or produces nothing, try the command ATandC1
to set the data carrier detect correctly and retry the ATandUP96 command.
Make sure the protocol is loaded and the version must be M for multi-transaction
auto-store version (ex. ver: M 0.98) before going to the next step.
Protocol adjustments: Some problems could occur if the PS2000 protocol
is not set. To set it up, use the command ATandUP9 1 to enable it. Note
that there is a space between 9 and 1 at the end of the command. From
this point, the modem is assumed available and ready.
Exit Hyper Terminal. Restart your computer.
4th step:
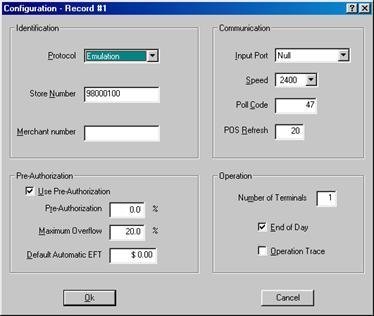
Setting EFT in Maitre'D
Electronic Funds Transfer / View / Options
Protocol:
Datacap - DataTran
Use Pre-Authorization:
Enabled
Pre-Authorization %:
0.0
Maximum Overflow %:
20.0
Input Port:
Select the COM port where your modem is connected.
Speed:
2400
POS Refresh:
18
Note: Remaining information is as per your client's desired configuration
and local authorities.
Click OK and Maitre'D will initialize the modem.
5th step:
Electronic Funds Transfer / File
Open Batch
6th step:
Electronic Funds Transfer / File
Close Batch
Trouble shooting
If when closing a batch you have the following message at the end of the
Datacap report:
206 0 INVLD ACCT! 'NF'
VOIDED
Transaction accepted: 0
RESETTING
REOPEN SUCCESSFUL
It means that one of the transactions in the batch that you try to close
is invalid. To fix this problem:
Print a list of all transactions in the current batch.
Copy the FILEXXX.DAT to a backup file as FILEXXX.000
(XXX = 109 for current batch, 157 for suspend batch)
Using the File Creator option from the Database module,
recreate that file with 0 record.
In the EFT module, add your transactions 10 at a time and close the batch
to find which transaction is giving you an error.