![]()
![]()
The External Order Service (EOS) allows to receive delivery sales straight into Maitre'D from a third party software, such as a transactional web site, an order taking software in a call center, or a Kiosk.
Orders are received through the internet in XML files, and are then validated before being accepted. This validation includes the verification of the check calculation, as well as the pre-authorization of a credit card, if this payment media was chosen.
These orders are integrated directly in the sales of Maitre'D, thus eliminating the need for a manual double entry in the system, which speeds up the processing and avoids errors.
Delivery zones can be received from the EOS, and can have different delivery fees and delays. These delays can also be modified from the Point Of Sales, or a zone can even be simply closed, following the closure of a bridge, for example.
Here are the different steps of an EOS order:
You can setup the system to use external zones coming from the EOS.
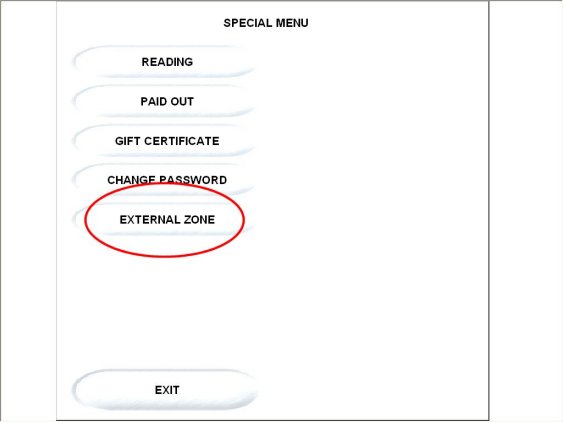
On the workstation, in the managers Special Menu, touch the External Zone button.
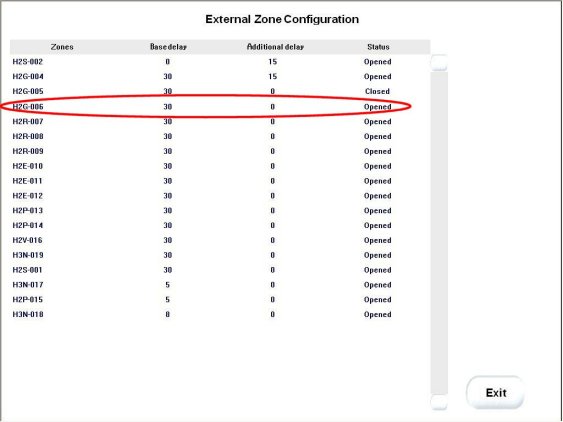
On the External Zone Configuration screen, touch the zone to be modified.
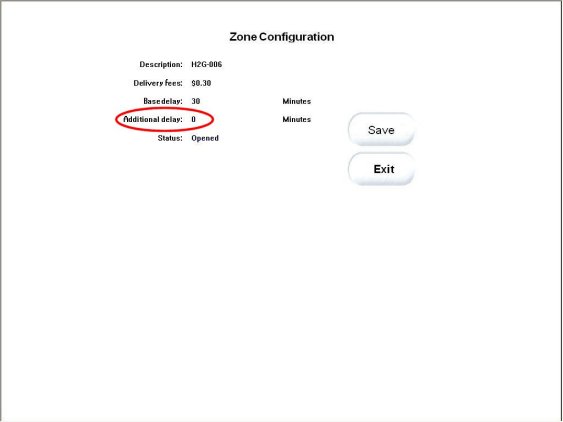
Touch the Additional Delay field.
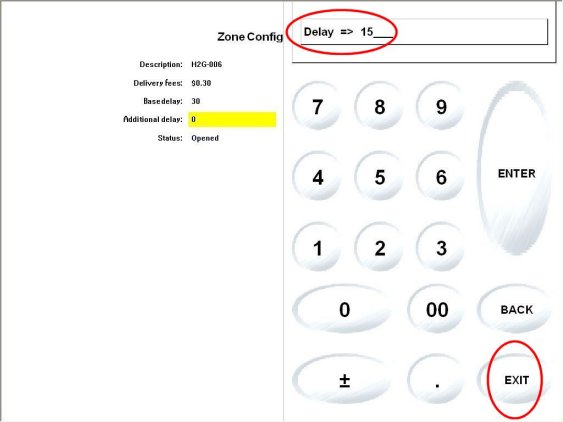
Enter the new delay in minutes, and touch the Exit button.
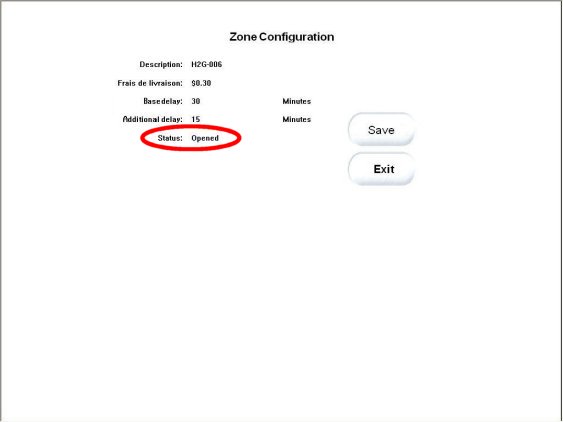
Touch the Status field.
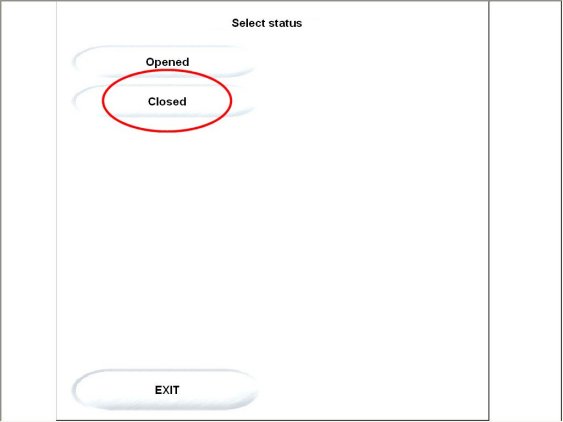
Touch the Closed button to stop delivering in that zone.
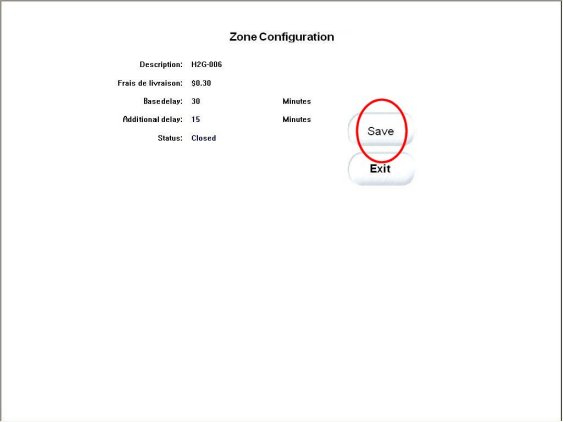
Touch the Save button to put into effect the changes done. These will then immediately be transmitted to the EOS.
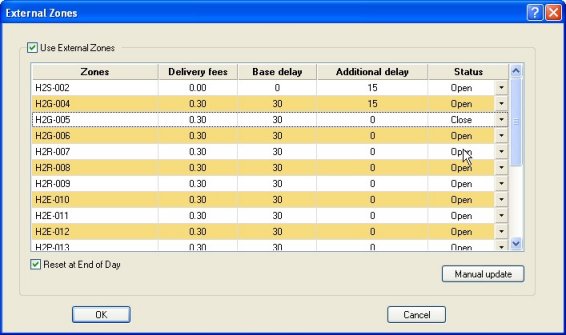
Enable this option to import delivery sections from the EOS.
This column displays the name of each external section.
This column displays any amount added for each external zone.
This column displays the minimum number of minutes required to get to each external zone.
Enter the extra time required to get to each zone, according to road conditions and rush hours.
Set this field to Close if the drivers currently can not get to that zone, because off road conditions. For example, if the main road leading to this zone is closed, you can shut down this zone for this restaurant, so that the EOS refuses orders, or tries to assign orders to another restaurant with their permission.
Enable this option to automatically bring back the Additional Delays to zero and the Statuses to Open at the end of the fiscal day. The Zones, Delivery Fees and Base Delays fields will then also be imported from the EOS.
Touch this button to import immediately the Zones, Delivery Fees and Base Delays from the EOS.
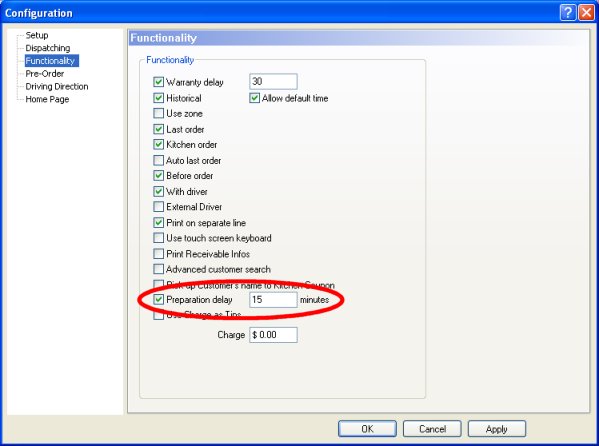
Enable this option to add the time in the Minutes field to the Base and Additional delays of each zone.
Enter the cooking time for all orders, to add on top of the Base and Additional delays.
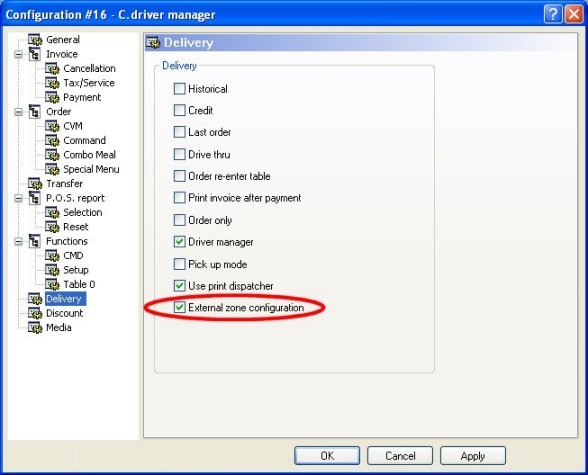
Enable this option to allow these Employees to modify the Additional Delays and Statuses of zones from the Points Of Sales.
Two types of Pre-Orders can be sent by the EOS.
Pre-Recorded orders are orders taken in advance for the same day. When the system accepts such a pre-recorded order, it is imported immediately and put on hold until the calculated preparation time is reached.
The preparation time for a pre-recorded order is calculated according to desired delivery time minus the delivery delays. All alerts are then calculated according to that time.
Because the Print Dispatcher screen is sorted chronologically according to the reception time, pre-recorded orders will display at the bottom of the list with a time in the future.
When the Preparation Time is reached, the check and preparation chit will be printed.
Pre-Orders are orders taken days in advance. When the system accepts such a pre-order, a pre-order chit is printed on the check printer. That chit contains the information of the pre-order.
Some limitations need to be noted for this type of order:
Pre-Orders received in Maitre'D will be processed automatically when the Preparation Time is reached.
The External Orders Service can also transmit messages from the call center towards the restaurant. For example, if one restaurant can no longer deliver to a particular delivery zone, the call center can ask another close by restaurant to takeover. Or also, if a customer calls back because an item was missing from the order, the call center can send a correction message to the restaurant.
The call center generates the message and sends it to the restaurant using Maitre’D’s web service. When the Maitre’D system receives a message, it confirms the proper reception of that message to the call center.
The message is assigned to the Employee setup in Delivery / View / Options / Pre-Order.
All messages assigned to this employee are considered as call center messages and displayed in the print dispatcher or printed automatically.
If the Print Dispatcher is disabled, the messages are automatically printed, in 2 copies, on the Receipt printer of the Workstation setup in Delivery / View / Options / Pre-Order. A reception notification is sent to the call center once the message is printed.
The messages are displayed in the Print Dispatcher with the title and message type. The title corresponds to the 16 first characters of the message’s first line.
The messages are always displayed in red at the top of the list.
The user must use the Detail button to read the message.
The Print and Print All buttons do not print these messages.
When the Detail button is touched after selecting a message, the Point Of Sales displays it through the Message Center.
This screen allows to:
Print the message, in 2 copies, on the Receipt printer of the Workstation setup in Delivery / View / Options / Pre-Order. A reception notification is sent to the call center once the message is printed.
Ignore the message. The message will remain displayed in the Print Dispatcher.
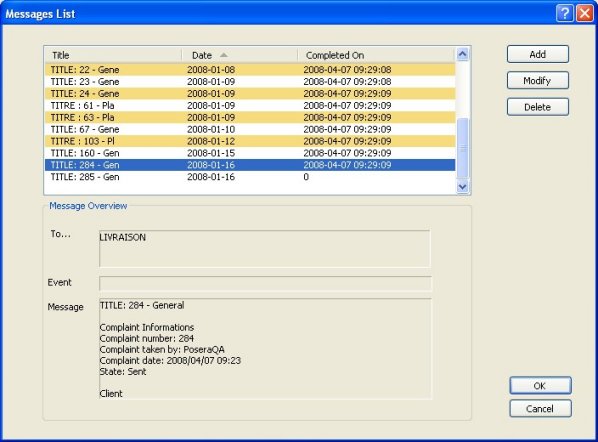
The message history is kept indefinitely. Users can remove message manually with the Delete button.
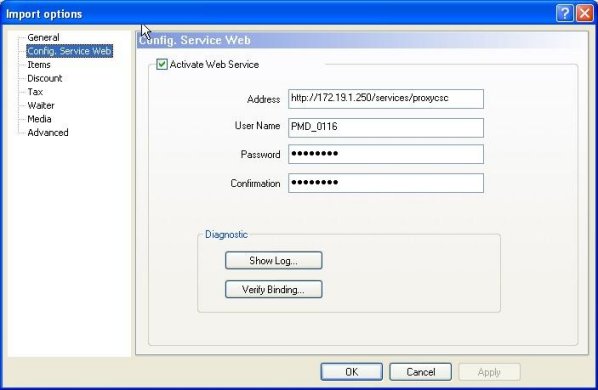
Enable this option to setup the different parameters needed to establish communication with the EOS.
Specify the URL of the web service the system must connect to.
Specify the username to use when identifying the system with the EOS.
Specify the password to use when identifying the system with the EOS.
Confirm the password that must match the one specified in the above field.
Click this button to display the event journal.
Click this button to confirm the communication configuration with the EOS.
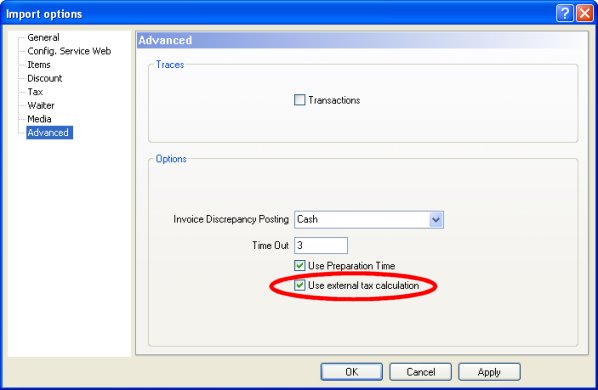
Enable this option to accept the tax amount from the external file rather the one calculated from the tax's setup in the P.O.S. Control module, if there is a discrepancy. In such an event, the difference will be posted to the media type chosen above, and will be logged in the answer files.
Enable this option to export configuration files during the End Of Day and after the application of a Broadcast for the External Order Service of the third party. These files contain all revenue centers and media types configurations, so that the EOS can be updated with all menu changes for the next day.
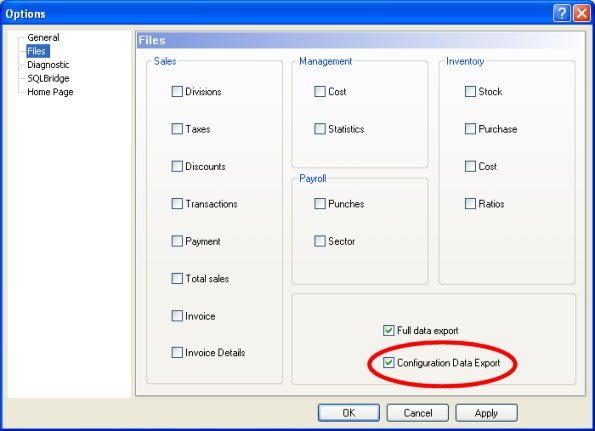
To compare all orders received through the EOS and all delivery orders processed in the restaurant, an XML file containing all checks can be generated during the End Of Day. That file is included in the FDE (Full Data Export) that will be transmitted to the Head Office with Maitre'D's E-Global tools.
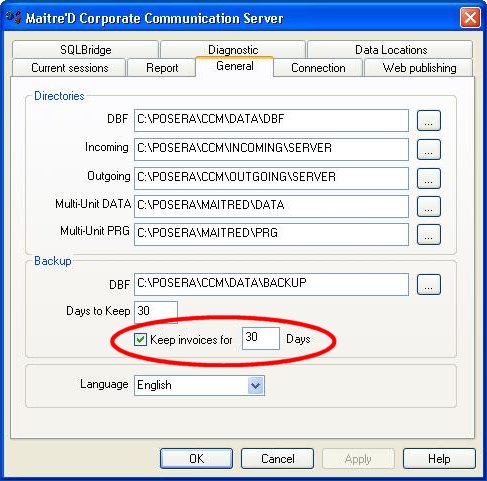
Enable this option to create the invoices copies file.
Enter the number of days to keep the history of the invoices.