This application is installed on the Server PC at the corporate office.
This application is used to generate reports from the database of all
restaurants. It is used to analyze information between restaurant units
or for the entire restaurant chain.
When you start this application the following screen displays:
The New option from the File menu allows to access the report template
menu of the analyzer application. Every report template is available under
the category tabs. These categories are Sales Details, Summary, Cost and
Statistics, Inventory, Management and Database. When you select this option,
the following menu is display showing you by category every report template
available in the Analyzer application
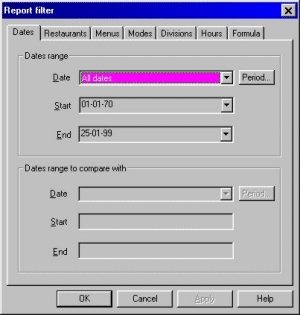
When you select one of the templates, Report Manager will show you available
filters to customize this report.
Dates
Dates Range
From the date filter page, select the date range you want to generate the
report for.
Select from the drop-down menu the date filter wanted. These choices are:
All dates
Current month
Current week
Current year
Custom dates
Last day
Last month
Last week
Last year
Today
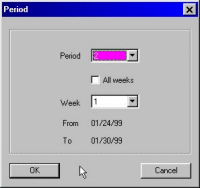
You can from the Period button, specify a specific week or period according
to the Database Manager / View / Options setup. When you select this button,
the following screen displays allowing to specify which period you want,
you can also specify a week number or select All for all weeks of the
period.
Restaurants
From the Restaurants page, select the restaurants you want to include in
your report.
Add All
Touch this button to select all restaurants
Remove All
Touch this button to disable every restaurant already selected.
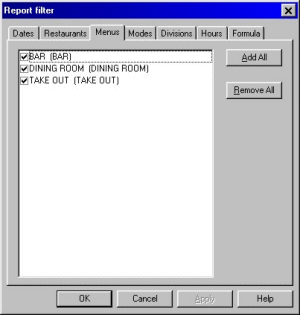
Menus
From the Menus page, select the menus you want to include in your report.
Add All
Touch this button to select all Revenue Centers.
Remove All
Touch this button to disable every menu already selected.
Modes
From the Modes page, select the modes you want to include in your report.
Add All
Touch this button to select all modes.
Remove All
Touch this button to disable every mode already selected.
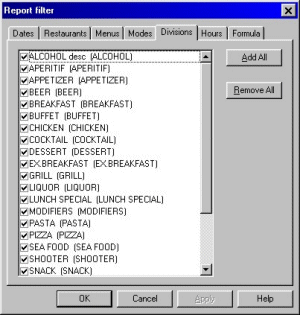
Divisions
From the Divisions page, select the divisions you want to include in your
report.
Add All
Touch this button to select all divisions.
Remove All
Touch this button to disable very division already selected.
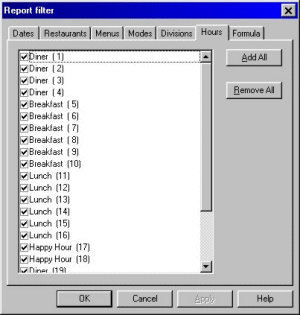
Hours
From the Hours page, select the hours you want to include in your report.
Add All
Touch this button to select all hours.
Remove All
Touch this button to disable every hour already selected.
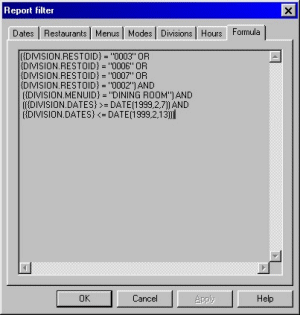
Formula
This tab shows every filter applied on this report. This page will be empty
if you did not apply any filter.
When you apply all the filters needed, click on OK to generate the report.
Then you can save this report and access it again using the Open option
from the File menu.
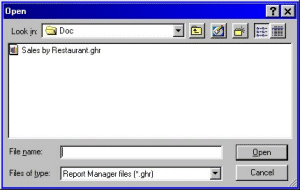
The Open option from the File menu allows to open custom reports that you
already created with the New option from the File menu. When you select
this option, the default directory where your reports are stored will
prompt you. Select from the reports available, the one you want to open.
When a report is on screen, a toolbar displays at the top of the window.
Following is a brief description of every tool available.
These arrows allow to shift from one page to another in the on-screen report.
This icon allows to print the on-screen report.
This icon allows to export the on-screen report in another file format
such as Lotus, Excel, Word or HTML. Also, you can save this report on
disk file, Exchange Folder or Microsoft Mail.
This option enlarges or reduces the view of your document as a percentage
of its normal size. To return your document to normal size, select 100%
from the drop-down menu.
The right side of the toolbar displays the generating status of the current
report where:
Total
Show total records used in this report.
000%
Show reading percentage of the database use to get the current report.
9999 of 9999
Show total records included in the report vs all records of the database
used.
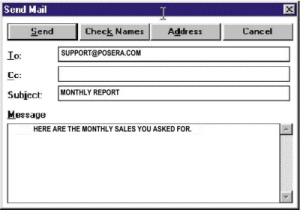
Following the generation of a report, if you have email functionality on
your PC, you can send this report by email to a colleague. To do so, when
the report is on screen, select the export icon:
The following windows displays:
Export
Format
Select from the drop-down menu the file format that you want for this export
report.
Destination
Select from the drop-down menu, Microsoft Mail (MAPI) and click on OK.
The following screen displays:
Enter the information needed.
Close
The close option from the File menu allows to close the current report
displays on screen. This option is not available if any report is currently
open.
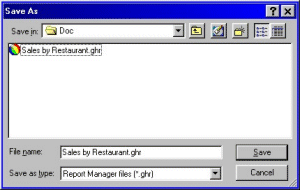
Save
The save option from the File menu allows to save the current report displayed
on screen. When you select this option, the system will display the following
screen asking to save the current report in the directory set as document
directory. Analyzer will show you the default name give to the current
report. You can change this name for a more appropriate name for the report
that you built. This option is not available if any report is currently
open.
You could ask, from the desktop, for a pre-save report without having to
start the H-O Analyzer application. This feature could be interesting
if you look for an easy way to generate specific report for a H-O Analyzer
non-familiar person. To do so, when you save the report, select from the
Save in field, the Desktop folder. Windows will display a new icon representing
this report on Windows Desktop.
Save As
The Save As option from the File menu allows to save a pre-save report
to another file name. This option is not available if any report is currently
open.
Recent files section
This section will show you the four last files that have been opened. You
can directly open these files using the file name displayed here.
Exit
Enable this option to exit the Corporate Office application.
View
Status Bar
This option allows to choose whether to display or not display the status
bar (the line located at the bottom of your screen) or not. This selection
toggles from enable and disable. When there is a check mark beside the
option, the option is enabled and you will see the status bar.
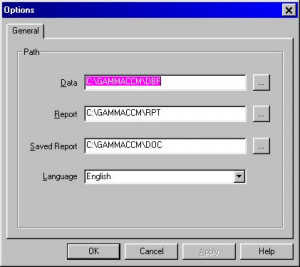
Options
Data
Enter the path where the information available for the Report Manager application
is stored.
Report
Enter the path where the report templates available for the Report Manager
application are stored.
Saved Report
Enter the path where the reports that you created from the reports templates
for the Report Manager application will be stored.
Language
Select the appropriate language English or Français.