Select from the Back-Office PC which COM port (1 or 2) you will use to
load the workstation and connect the APLD cable to it then plug the other
side of the cable to the COM port 1 of the workstation.
Set the SHARP 5700 in APLD mode. To do so, you need to set the dip switches
as follow:
WARNING: When you set dip switches, the SHARP 5700 must be shut down
to prevent any damages to the unit.
When dip switches are set, start the SHARP, it will boot in APLD mode.
The message Command Waiting will be prompted to you waiting for download.
Creation of the Workstation LAN disk
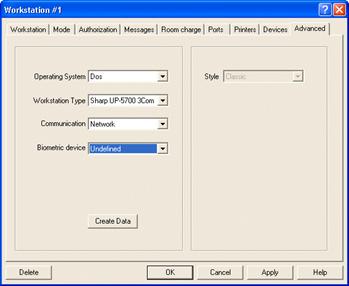
Workstation setting
P.O.S. Control / Workstation / Options
Program the different devices that are use by that workstation.
Under Communication Tab:
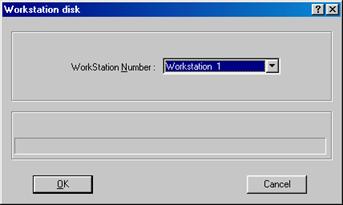
Workstation LAN Disk
Server Control, Tools, Workstations Disk...
Select the workstation number:
Click on OK to accept that selection, Maitre'D will create a LAN boot directory
for the SHARP
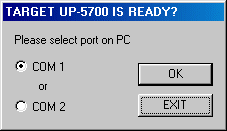
When the program is ready to download, the following screen is displayed
asking you which COM port of the Back-Office PC you will use to APLD the
workstation:
Select the proper COM port and click OK to continue.
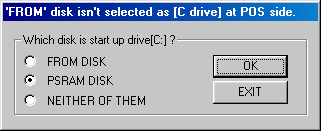
Then select PSRAM DISK from the choice of start up drive for the workstation
and click OK to continue.
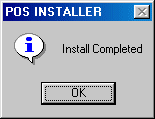
The Back-Office will start loading the workstation. When the APLD program
will be finish, a status screen will be prompted to you letting you know
when the download is completed:
Click OK to continue.
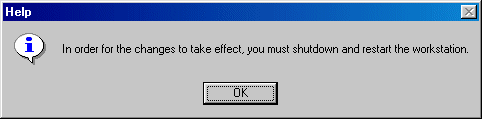
Another screen will tell to shutdown and restart the workstation in order
for the changes to take effect:
Booting the SHARP for the first time
Set back the workstation to operation mode. To do so, set the dip switches
as follow:
Disconnect the APLD cable, connect the SHARP to the network and restart
the workstation.
WARNING: When you set dip switches, the SHARP 5700 must be shut down
to prevent any damages to the unit.