![]()
![]()
On the kitchen coupon, both the salads are combined on the same line, but the dressing modifiers are separated on different lines, letting the chef know that the French dressing goes with the special menu salad, and the Italian dressing goes with the regular salad. This is printed thus in case the special menu salad is presented differently and/or in a different size.
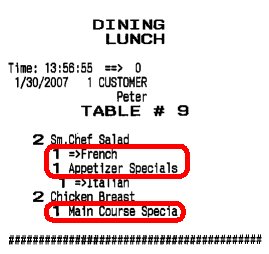
Likewise, both the chicken breasts are combined on the same line, but an additional modifier line is printed to let the chef know that one of these is part of the special menu, so that he knows which salad to put with which main course, in case the special menu chicken is presented differently and/or in a different size.
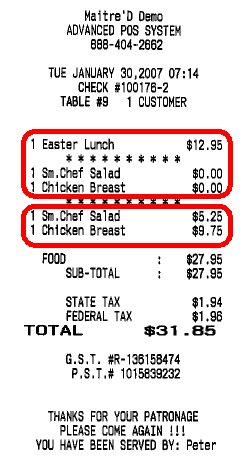
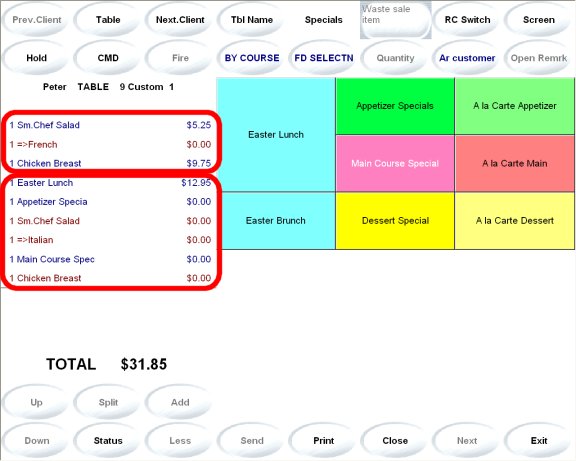
On the guest's check, the special menu is printed first, followed by its components, which show as free. Below the special menus, the regular sales items ordered separately from the special menus are then printed at their regular prices.
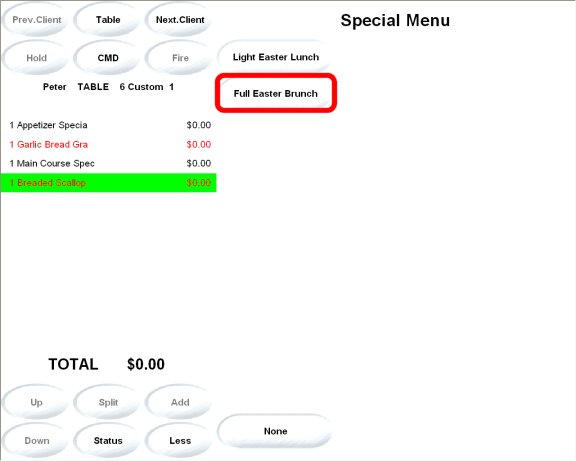
If the employee touches the Print button after ordering the free components, but forgot to order the actual special menu that contains the price, the employee has to select one of the possible special menus, according to the free items already ordered.
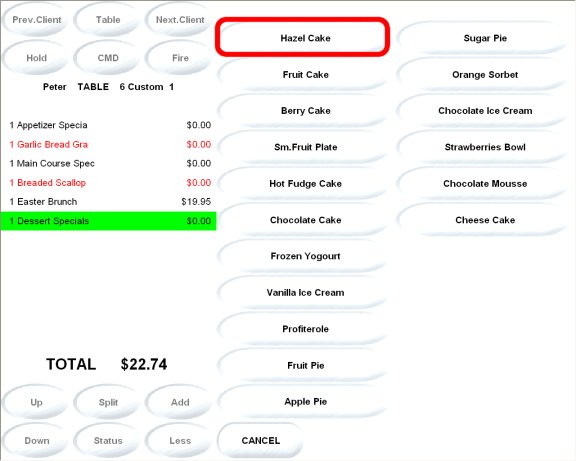
If the chosen special menu actually includes yet another free component, the employee is prompted to order it.
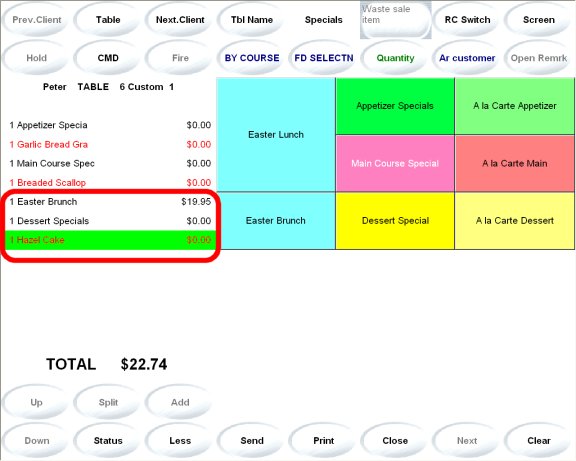
Once the priced special menu and the included dessert have been selected, the check can be printed.
Also, if the Open Tables option is enabled in P.O.S. Control / Employees / Employee / Report, the employee can print a financial report even though there are open tables or checks by touching the Reading button.
On the Financial Report screen the Gross Sales line displays All Sales, including all closed sales added with all ordered items on open tables or checks.
On the Financial Report, the All Sales line prints the Gross Sales. Also, a warning is printed towards the end of the report above the list of all open tables or checks.

Revenue
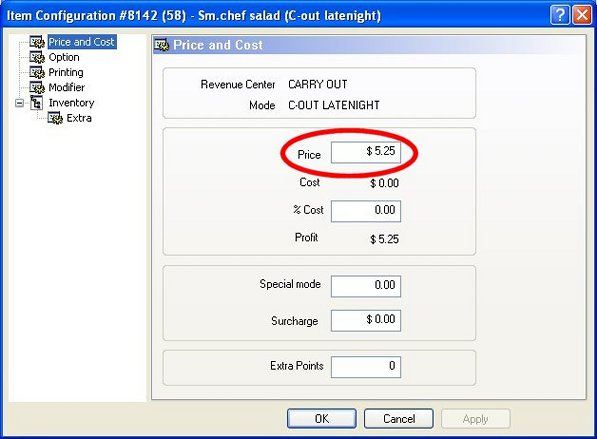
Enter the value of this sales item when sold separately.
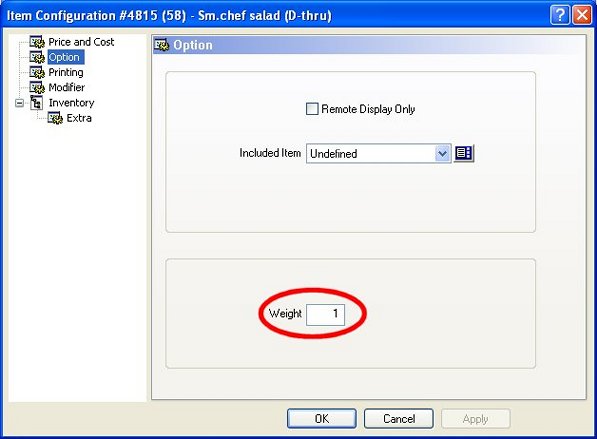
Enter 1.
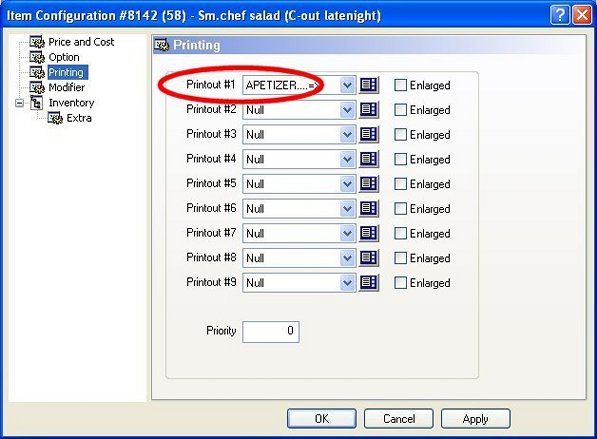
Select the appropriate printer.
Enable this option even if this sales item itself does not need call a modifier, because it will be called as a free modifier by the Control Item.
Repeat these settings in all component items.
Call these sales items as components.
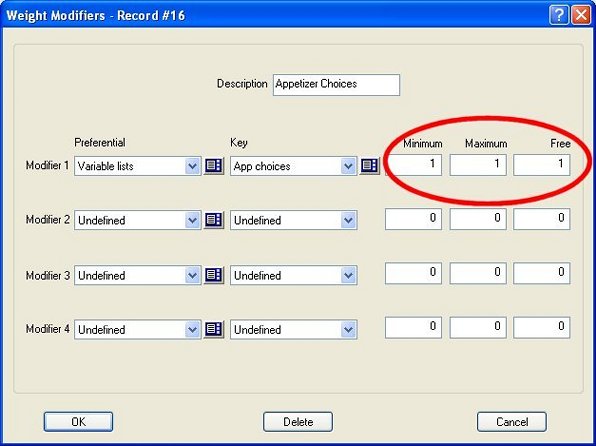
Set all of these fields to 1, unless you want to include multiple components of the same type, such as cheese selections on a tasting menu.
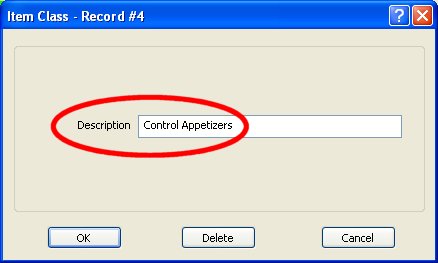
Create an individual Item Class for each Control Item.
Repeat these settings for all Control Items.
The Control Items are the free items that call sales items as free modifiers.
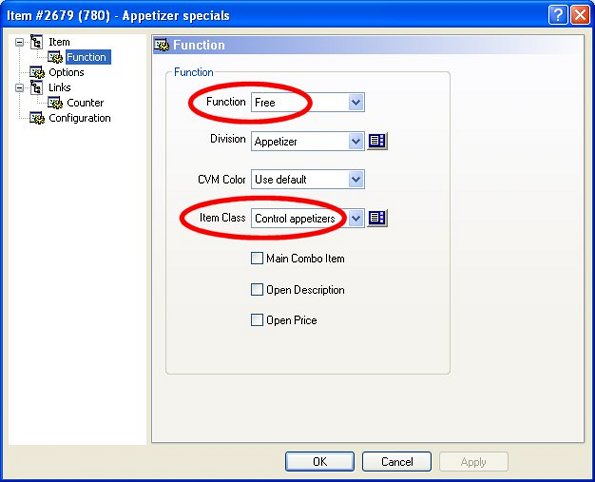
Free
Select the individual Item Class for that Control Item.
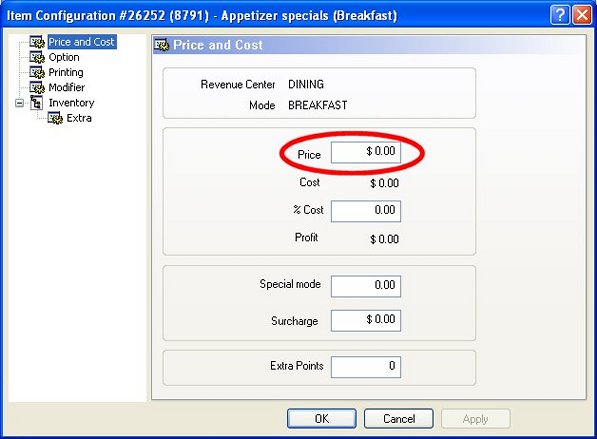
Enter 0.
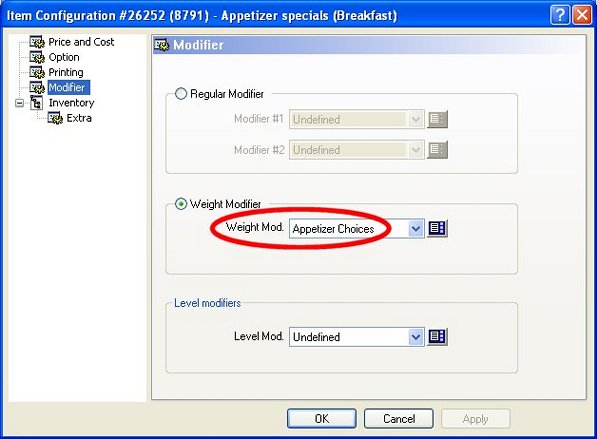
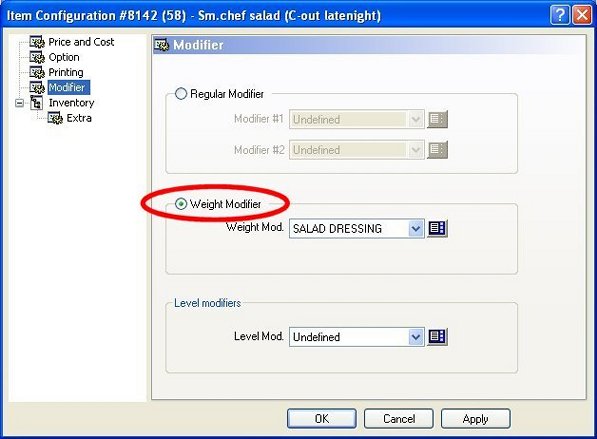
Select the weight modifier containing the components.
Repeat these settings in all component types.
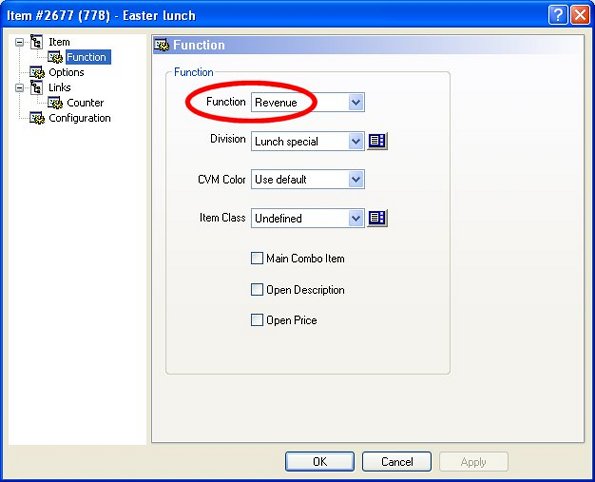
Revenue
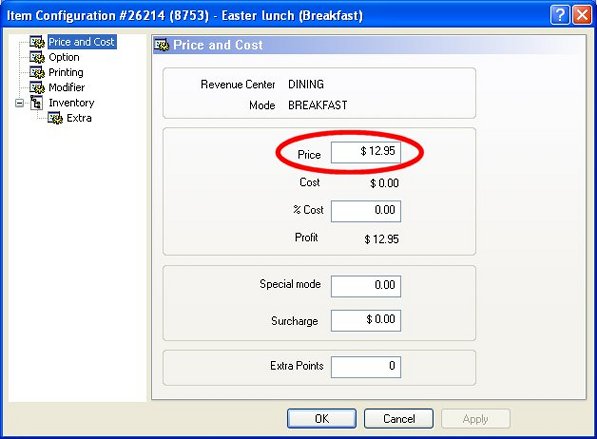
Enter the value of the Special Menu when ordered together.
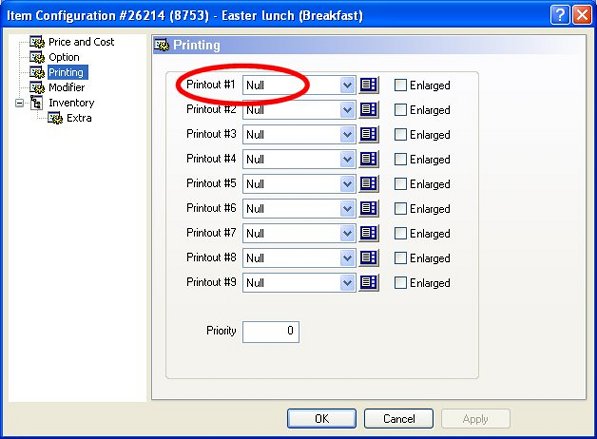
Null
Repeat these settings for all Special Menus.
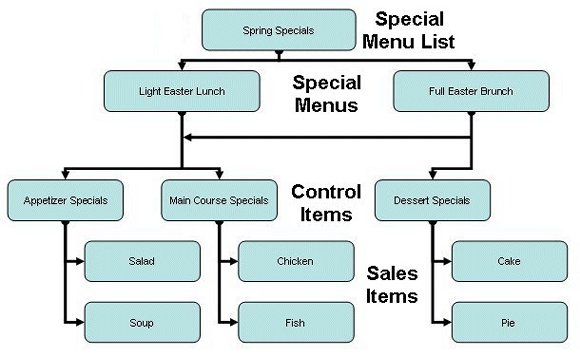
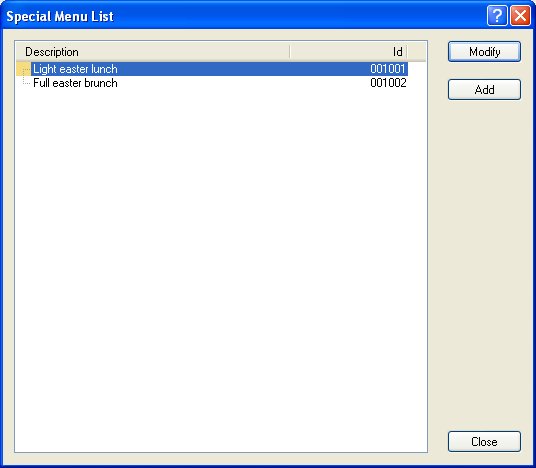
 P.O.S. Control / Revenue Center / Special Menu List
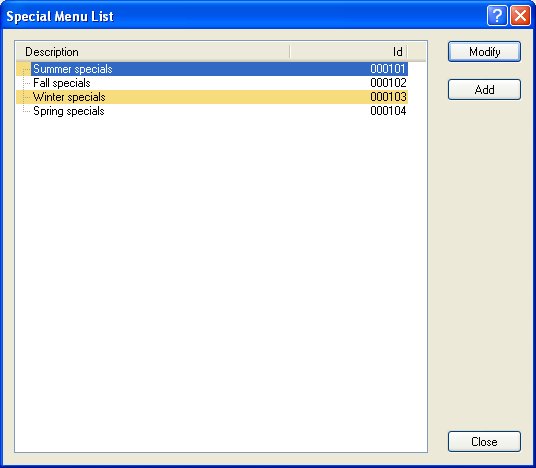
Click on Add.
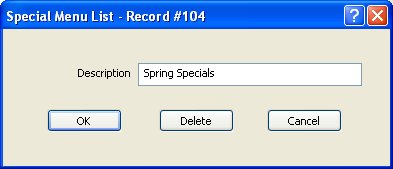 P.O.S. Control / Revenue Center / Special Menu Settings
Special Menu Settings are used as validation tables for these specials.
Click on Add.
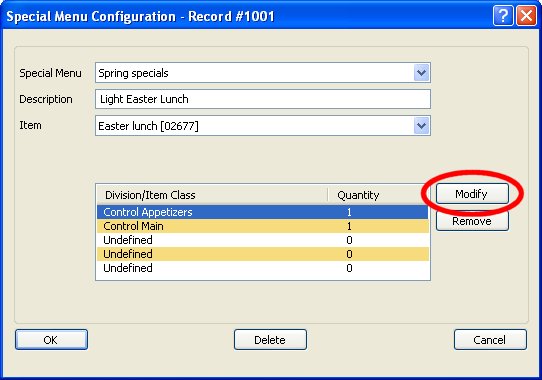
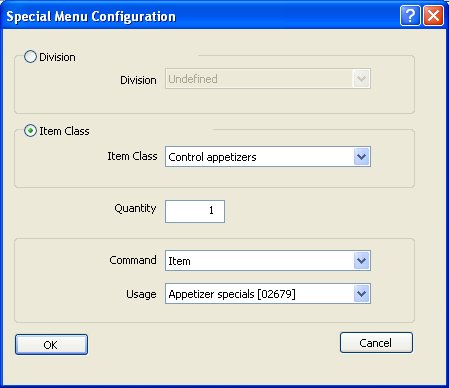
Set this field to 1, unless you want to offer multiple components of the same type, such as cheese selections on a tasting menu.
Select if the free Control Item is detected by Item, Item Class or Variable List.
Select the free Control Item, Item Class or Variable List that call sales items as free weight modifier for this part of the meal. If you forgot to order this free Control Item, but chose a priced Special Menu item that includes this Control Item, you will have to select this control item and a free sales item that it calls as weight modifiers before printing the check. Inversely, if this free Control Item is ordered, but no special menu that contains it is present, you will have to choose a special menu.
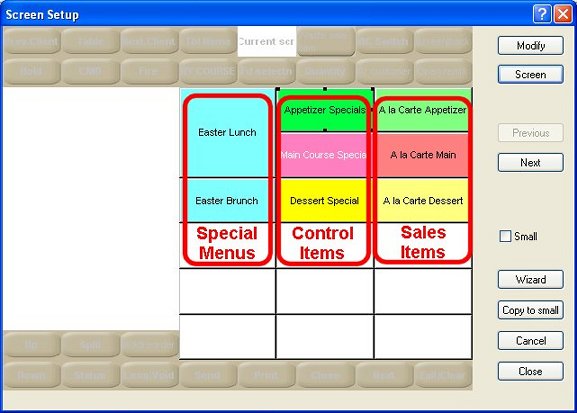
Create buttons for your priced Special Menu items, free Control Items and variable lists containing the priced Sales Items.
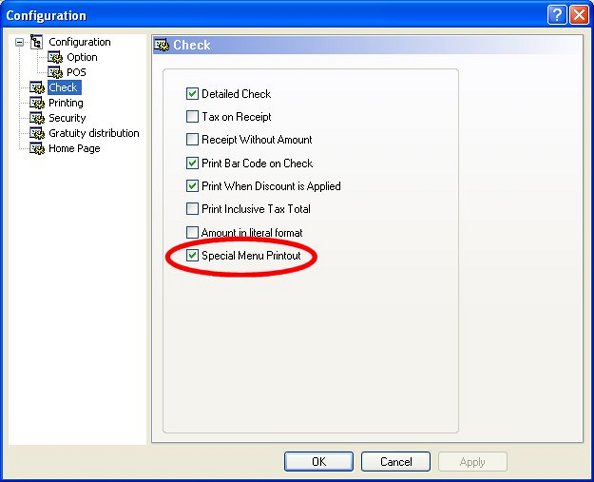 Special Menu Printout:
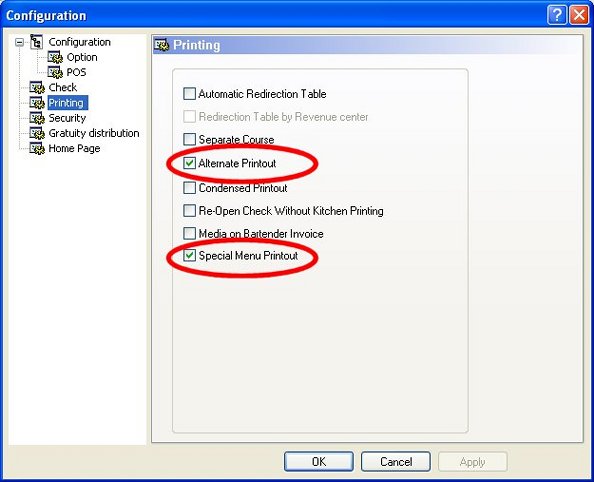 Special Menu Printout:P.O.S. Control / Employees / Configuration / Order
/ Special Menu
Special Menu Printout:P.O.S. Control / Employees / Configuration / Order
/ Special Menu
You can stop the compilation of the modifiers of a division on the kitchen coupon. When ordering the same item with multiple different modifiers, such as the pizzas in the example below, the chef does not know which modifiers to combine on an individual sales item. If you disable the kitchen compilation for a division, such as the highlighted ribs in the example below, each sales item's modifier are listed separately. This can be useful for the cook when ordering similar items for multiple guests on the same customer screen.
Enable this option to print the modifiers of sales items from that division separately in the kitchen, starting with a star.
When the Special Menu Printout options are enabled in both P.O.S. Control / View / Options / Check & Printing, many existing functions behave slightly differently:
The Logical Printer name is printed on the header of requisition coupons.
The Check buttons on the closing screen display the invoices totals.
The Modify Payment screen of Manager Function displays the media types available to the original employee.
Table Transfer from another employee switches to the new employee's revenue center.
The Item Discount buttons on the Order screen are applicable on previously ordered items.
The Upsize function allows upsizing items that have already been ordered.
If the No Customer Count option is also enabled in P.O.S. Control / Employees / Configuration / Order, you can skip guests of regular tables from the customer count in reports by allowing to enter Zero (0) when the # of Customers option is set to Beginning in P.O.S. Control / Revenue Center / Options / Options. This is useful to avoid double count of a client who orders a coffee and a dessert after paying the main meal, for example, or a customer ordering in the lounge bar while waiting for a table to become available.
If the Assignment Override option is enabled in P.O.S. Control / Employees / Configuration / Functions / CMD, when these employees touch the Table button without entering a table number. The floor plan is displayed with the color and blinking scheme setup in Floor Management / View / Options / Status. From this screen, they can simply touch the table they want to open.
![]()