(Maitre'D 2003, from Service Pack 7 and later versions of Maitre'D)
Maitre'D supports the AccuVIEW Remote Display connected through a workstation,
instead of straight to the Main Back-Office Server.
Note: In Maitre'D 2003, the CVM interface must be active on the Maitre'D
license.
Hardware Setup
Connect the POS connector of the Autoswitch to the
serial port of the POS. Use the DB25 / RJ12 connector number 102752 (supplied
by Texas Digital Systems) on the Autoswitch and, depending on the COM
port type of the POS, either the same 102752 or the DB9 / RJ12 connector
number 103874. A standard RJ12 cable can be connected between the two
(2) adapters.
Connect an RJ-12 cable between the Autoswitch (OCB
input) and the back of the AccuVIEW.
Note: The Autoswitch (or Converter) is critical because it changes
the RS232 signal from the POS to RS485 for the display.
Maitre'D Setup
System Configuration / View / Options / Devices
Remote Display:
Select AccuVIEW to make this protocol available to the workstations.
Note: In Maitre'D 2003 Service Pack 7, this field is disabled if the
Kitchen Monitor field is set to Posera CVM. Service Pack 8 enables it.
P.O.S. Control / Workstation / Printer Type / Special
You also need to define a printer type with the Remote Display option enabled,
so it can be added as a workstation's device, and used as a shared printer.
Remote Display:
Enabled
P.O.S. Control / Workstation / Printer Type / Status
Status:
Make sure this field is empty.
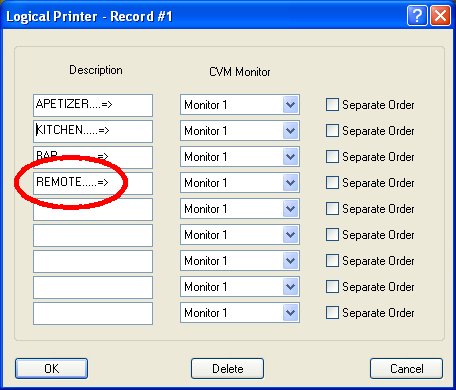
P.O.S. Control / Workstation / Logical Printer
Description:
Setup a new Logical Printer
P.O.S. Control / Revenue Center / Items Setup / Configuration / Printing
Printout #:
Setup all items you wish to send to the remote display.
P.O.S. Control / Employee / Configuration / Order / CVM
On the Fly Printing:
Enabled.
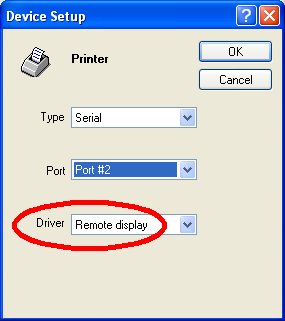
P.O.S. Control / Workstation / Options / Devices
Type:
Serial.
Port:
Select the physical serial port where the AccuVIEW display is connected.
Driver:
Select the AccuVIEW Printer Type.
P.O.S. Control / Workstation / Shared Printers
Locate the Remote Display on the workstation and port where the AccuVIEW
display is connected.
P.O.S. Control / Workstation / Options / Printers
Set the Remote display Logical Printer to the Shared AccuVIEW.
Communication Check (AccuVIEW)
To verify the communication with the AccuVIEW, a PC can be connected to
the PC input of the Autoswitch, using the same connectors mentioned in
the Hardware section above. Using any serial communication tool (such
as HyperTerminal), adjust the communication settings to 9600 baud, 8 data
bits, 1 stop bit, no parity and no flow control. Once the port is open,
the Autoswitch will switch to PC. Send the following: >bobo
<CTRL-B>~AT<CTRL-C>
(Case sensitive), and you should receive the string 'OK' back from the
AccuVIEW.