Technical Note: 20031022008
EPSON Mobilink TM-60 Printer
(Maitre'D 2003, from Service Pack 3 and later versions of Maitre'D)
First install the TMNet WinConfig configuration utility from EPSON that
will allow to change wireless Ethernet and TCP/IP settings through a serial
connection. Connect the TM60 to the computer using the supplied serial
cable. The connector is situated on the left side of the printer, at the
back of the unit. Start the TMNet WinConfig software installed with the
default options.
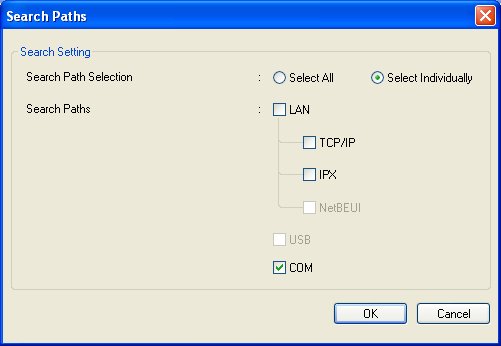
Tool / Search Method
Select Individually:
Enabled.
COM:
Enabled.
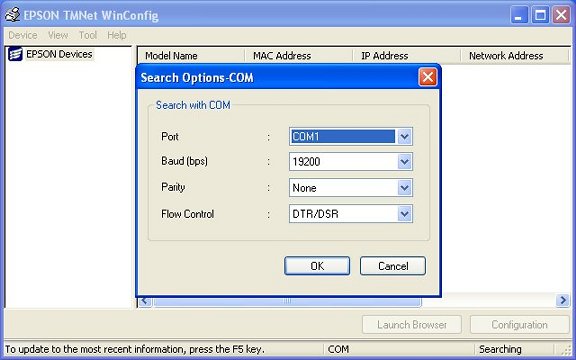
Tool / Search Options / COM
Setup serial parameters so they match parameters shown on the printer when
performing a Self-Test.
View / refresh
The printer will be detected and displayed on the right side of the window.
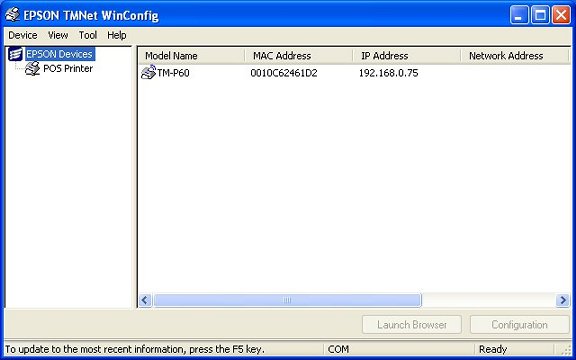
Highlight the printer and click on the Configuration button.
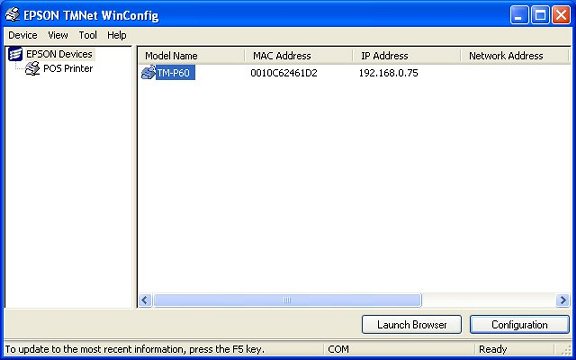
Printer / Configuration

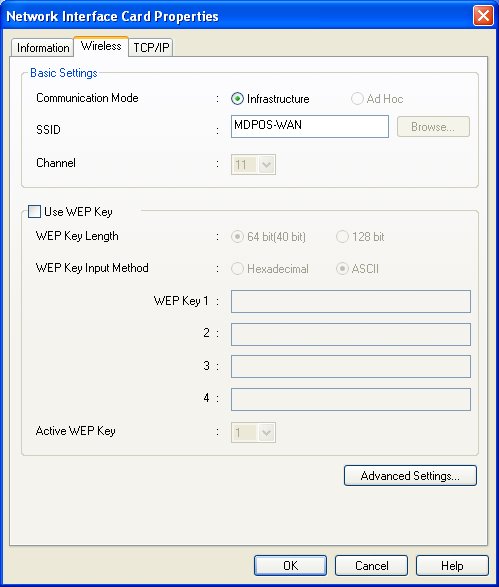
Printer / Configuration / Wireless
Infrastructure:
Enabled.
SSID:
Enter Access point or Router you want the printer to connect to.
Note: If you are using a WEP encryption key, configure it as well.
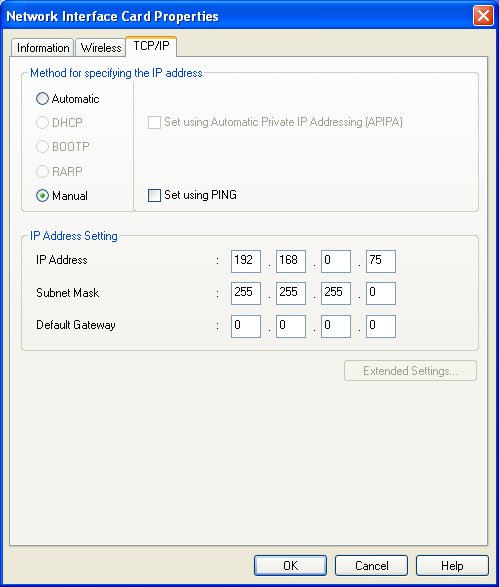
Printer / Configuration / TCP / IP
Manual:
Enabled.
IP Address:
Printer's address.
Subnet Mask:
255.255.255.0
Click OK, and confirm the data upload to the printer by clicking OK again.
When prompted to enter a password, simply click on OK again, without a
password.

Once the download of the new configuration to the printer is finished,
perform a Self-Test on the printer to make sure the changes you made took
effect.

You can exit the TMNet WinConfig software and disconnect the serial cable.
Turn the printer Off then On to re-initialize the wireless communication.

Maitre'D Settings
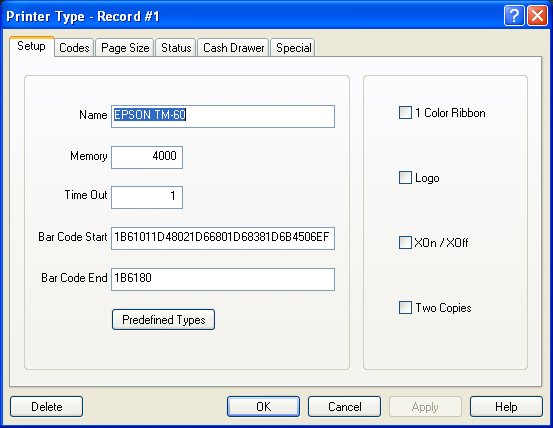
P.O.S. Control / Workstation / Printer type / Setup
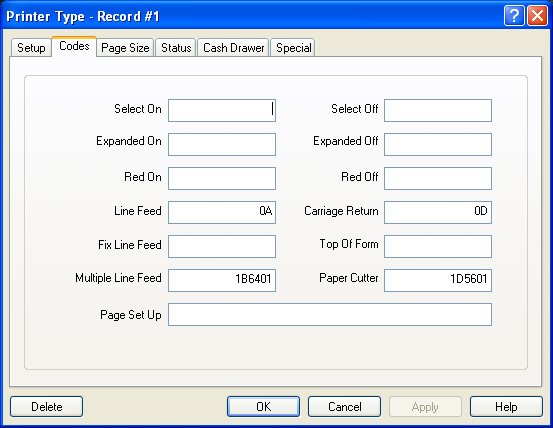
P.O.S. Control / Workstation / Printer type / Codes
Note: The TM-60 does not support the Printing Mode selection command
code (ESC!) thus disabling the Enlarged printing option.
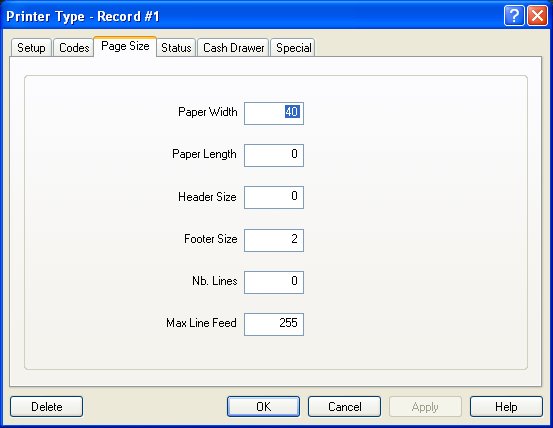
P.O.S. Control / Workstation / Printer type / Page Size
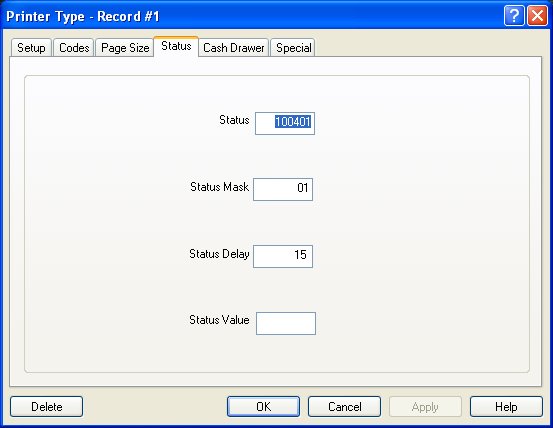
P.O.S. Control / Workstation / Printer type / Status
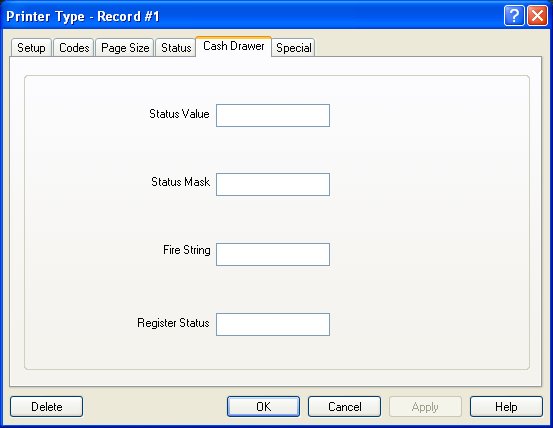
P.O.S. Control / Workstation / Printer type / Cash Drawer
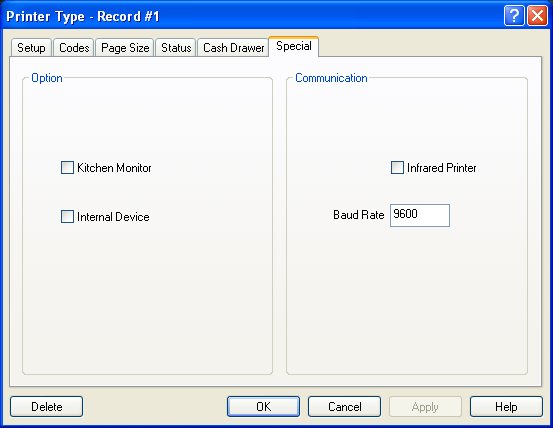
P.O.S. Control / Workstation / Printer type / Special
P.O.S. Control / Workstation / Option / Device
In the Workstation that will be controlling the TM-60 printer, add a network
printer and configure it with the proper settings.
P.O.S. Control / Workstation / Shared Printers
If other workstations need to access this printer, create a Shared printer
under and assign printouts in the workstations accordingly.
Troubleshooting note: If the printer does not print the jobs being
sent to it, the first thing would be to "Ping" it from the server.
If you can not ping it, verify the settings in printer. Make sure that
you are working with the right addresses and Subnet mask. Also make sure
that the serial cable is disconnected from the printer. If you can ping
it, verify your settings in the Maitre'D Back Office Software. If the
printer looses its connection to the access point, it will beep 5 times,
and the power light will keep flashing until it reconnects. Once reconnected,
it will stop flashing, but it must be reset to re-establish its connection.