(Maitre'D 2003, from Service Pack 8 and later versions of 2003)
Back-Office computer Setup
P.O.S. Control / Workstation / Options / Advanced
Operating System
Windows CE .NET
Workstation Type
ARM
Once you click on 'OK', the system will prompt you with the following
message;
'The modifications require to make the workstation data...'
Click 'Yes' to refresh all workstation data.
Setting up a Handheld workstation
Note: It is important that the Windows CE .NET operating system
is installed on the Pocket PC before proceeding with the configurations.
Connect the Handheld.
1. Connect a USB drive (smart drive) on the Main Back-Office Server. 2.
Copy the whole Posera\MaitreD\Data\WSxx folder to the USB drive, where
xx is the workstation number. (Ex: WS01 for Workstation 1) 3. Disconnect
the USB drive from the Main Server, and connect it to your Handheld workstation.
4. On the Handheld, double click on My Computer, and copy the WS01 folder
from the USB drive into the \FlashDisk folder under My Computer. 5. Rename
the WS01 folder to WS. 6. Create a Shortcut on the Desktop that points
to the Startup.Exe application within the WS folder. 7. To start the workstation
application, click on the Startup.Exe Shortcut.
Note: In Maitre'D 2002 and 2003, 32 Mb of Memory is required, but 64
Mb is recommended. In Maitre'D 2005 and above, 64 Mb of Memory is required.
Handheld Workstation using TCP/IP protocol
Required materiel for a Handheld CE .NET device
* Handheld supported by Maitre'D SHARP UP-X200 * Wireless Hub
Configuring your wireless HUB
Here are two (2) ways to configure your wireless HUB: A. HyperTerminal
B. Internet
A. HyperTerminal
Using a null modem cable
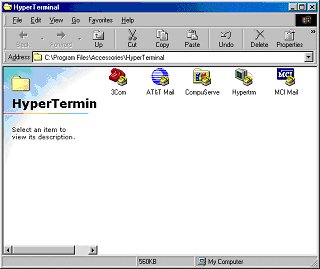
Configure your hub through HyperTerminal, by opening session through Start / Programs / Accessories / Communications
/ HyperTerminal
Select one of the Icons to dial-in to the wireless HUB to start a session.
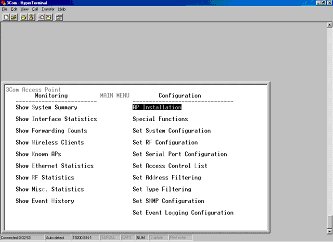
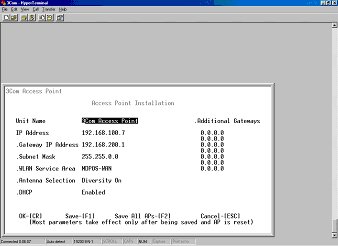
Press 'Esc' on your keyboard.
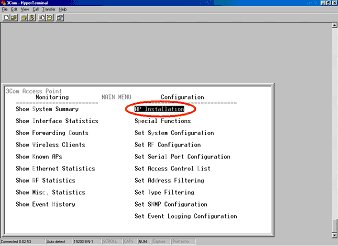
Use the arrow keys on your keyboard to highlight the 'AP
Installation (Access Point Installation)'option, and press
Enter.
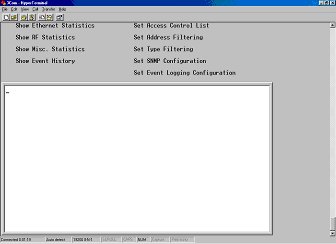
Use the arrow keys to highlight the selection and enter the configurations
for your wireless hub.
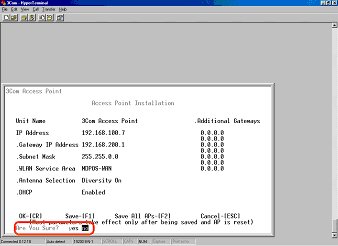
Once the configuration is complete, press 'F1' on your keyboard to save
these settings. The message 'ARE YOU
SURE?' will appear.
Press 'Y' to confirm your settings.
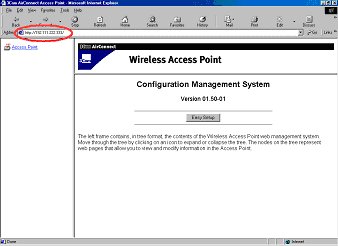
B. Internet
While on the Internet, enter the IP address of the HUB in the ADDRESS section
of your browser.
Note: You must address an IP address through HyperTerminal to
configure your wireless HUB through the Internet.
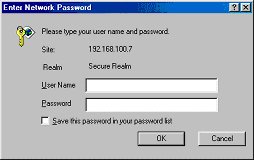
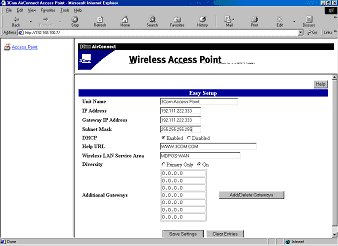
Click on the 'Easy Setup' button. The system will prompt you with a Login
window.
Enter your username and password in the appropriate spaces and then click
'OK'. The system will bring to a screen called 'Easy
Setup'.
Enter all the information in their proper locations, and click on 'Save
Settings' to save the configurations.
If you want to start over your configurations, click on 'Clear Entries'
to clear all the previous settings.