![]()
![]()
http://www.toshibatec-ris.com/products/pos/productsinfo/st71/index.html
|
CPU |
Celeron® 2GHz | |
|
Memory |
256MB,2slot
(max. 2GB) | |
|
Display |
12" TFT | |
|
Resolution |
800 x 600 (SVGA) | |
|
Brightness |
320nit(cd/m2) | |
|
Touch Panel |
Resistive | |
|
|
Option | |
|
Customer Display |
Option (15" TFT or 13" TFT or 2x20 VFD) | |
|
HDD |
Option (2.5"HDD x max.2) | |
|
|
Option | |
|
MSR |
Option (ISO track1,2) | |
|
ibuttonReader |
Option | |
|
Interface: |
RS-232C |
4 (2:powered) , option (max.2:powered) |
|
1 |
1 | |
|
2 |
2 | |
|
PS/2 keyboard and PS/2 Mouse |
PS/2 keyboard and PS/2 Mouse | |
|
2 |
2 | |
|
1 |
1 | |
|
10BASE-T/100BASE-TX |
10BASE-T/100BASE-TX | |
|
Line-out / Mic-in |
Line-out / Mic-in | |
|
Powered USB 24V |
Powered USB 24V | |
|
24V out (3-pin DIN) |
24V out (3-pin DIN) | |
|
Operating Temperature |
5°C - 35°C | |
|
Operating Humidity |
10 - 80% RH Non condensation | |
|
Water Proof |
IPX1 | |
|
Weight |
11.5kg | |
|
Power Supply |
250W ATX | |
|
Support Driver |
Windows®2000,Windows®XP | |
|
Dimensions |
| |
Start with the SETUP.EXE in the Winxpdrv folder.
Once the setup completes, the unit will respond with "Do you wish to restart?".
Click no and proceed to install the control module.
From Windows explorer open the folder OPOSCTRL and run the SETUP.EXE.
When prompted for user type, select "End user and developer".
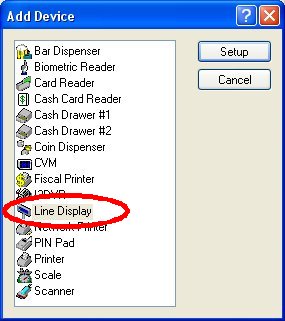
Next you will have a selection of TEC peripherals.
Check only the ones you are actually using such as MSR (card reader) and Line Display...etc.
Click NEXT until completed.
You will be prompted with "succeeded" upon successful loading of the drivers that are loading to the registry.
At the completion of this install, reboot the system and test.
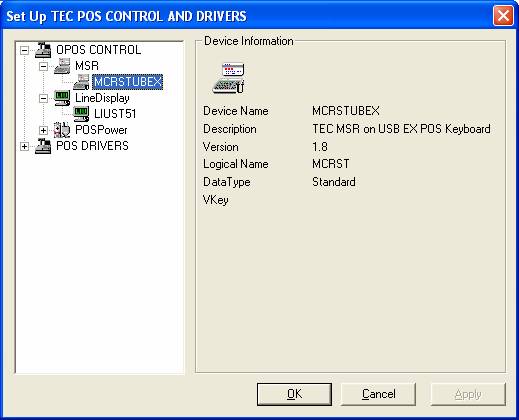
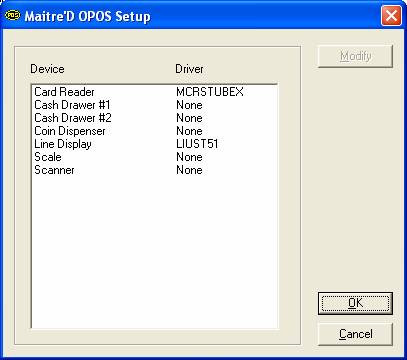
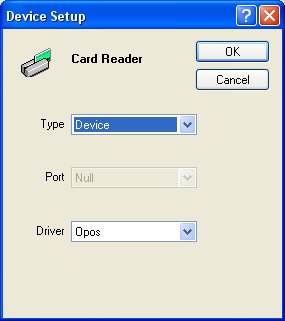
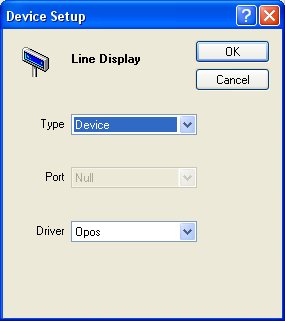
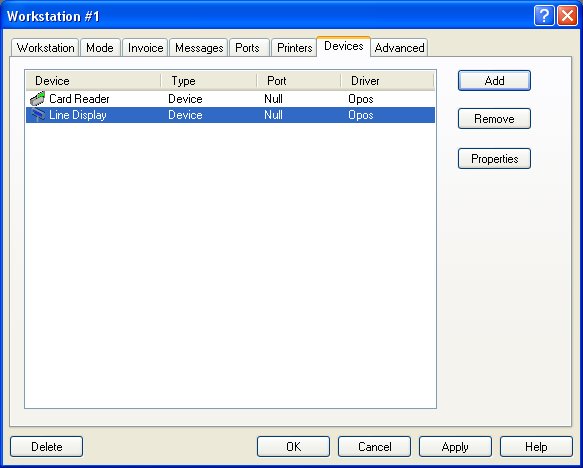
During the Maitre'D POS Workstation installation process, when the system prompts to install OPOS drivers, click "Yes", and select the devices you want to install on your POS.
Select the Card Reader, click on "Modify", to associate it with the MCRSTUBEX driver.
Select the Line Display, click on "Modify", to associate it with the LIUST51 driver.

![]()
